
Blog
Step by step carpet joining: a complete DIY guide

Jul
TL;DR:
- Proper carpet joining requires careful preparation, precise cutting, and controlled heat bonding to create a seamless and durable finish. Using the right tools, such as a seaming iron and seam roller, ensures a tight, invisible seam that withstands foot traffic. Patience during cooling and finishing with solid brass trims extend the seam’s longevity and professional appearance.
Carpet joining is the process of cutting, aligning, and bonding two carpet edges to create a single, continuous surface with no visible gap. Done correctly, the result is a join so tight that you can barely see it. Done poorly, you get lifting edges, visible ridges, and a seam that fails within months. This guide walks you through every stage of step by step carpet joining, from selecting the right tools to finishing with a trim that holds for years. Whether you are fitting carpet in a bedroom, hallway, or living room, these professional techniques apply directly to your project.
What tools do you need for step by step carpet joining?
The right tools determine whether your seam holds or fails. Professional carpet installers rely on a specific set of equipment, and skipping any one of them produces a noticeably weaker result.
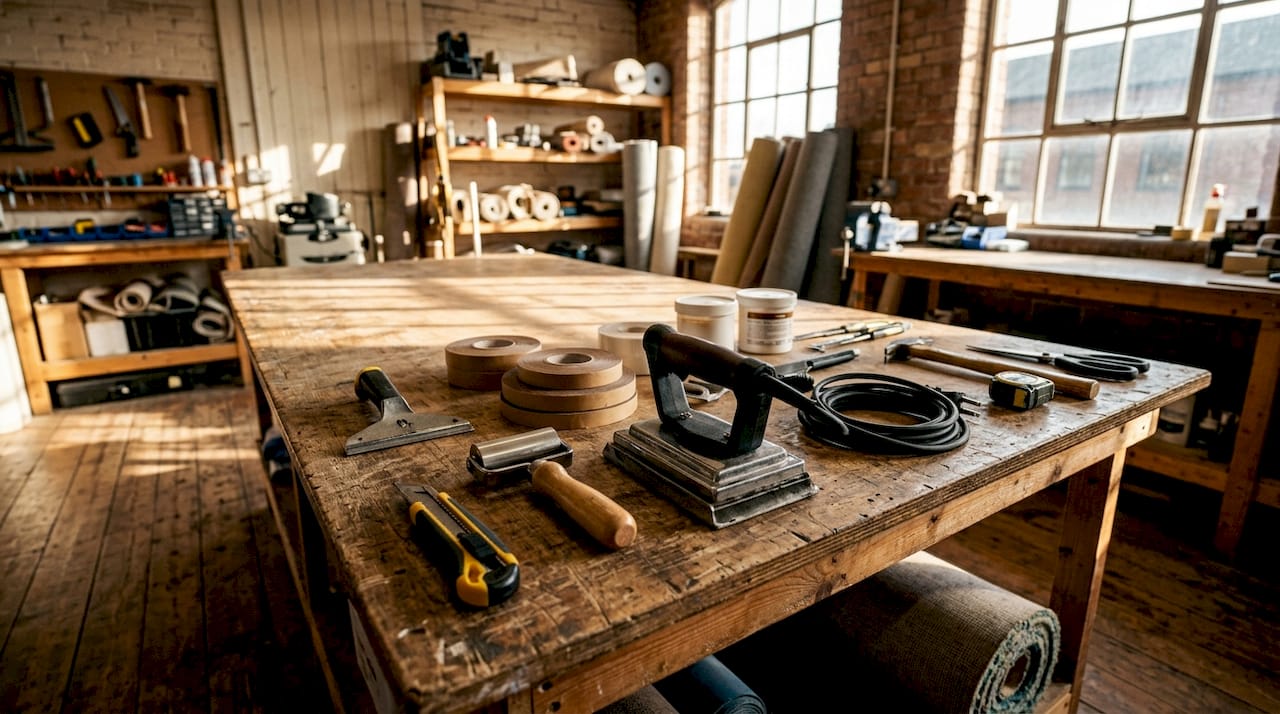
The core toolkit for joining carpet edges includes a seaming iron, hot-melt seam tape, a seam roller, a carpet cutter or bolster knife, seam weights, and a seam tractor. Each tool plays a distinct role in the bonding process.
| Tool | Function | Recommended specification |
|---|---|---|
| Seaming iron | Melts adhesive on seam tape | Grooved-base iron preferred; 140–160°C |
| Hot-melt seam tape | Bonds carpet backing to backing | Industrial strength; width matched to carpet gauge |
| Seam roller | Presses fibres into warm adhesive | Heavy-duty, flat-faced roller |
| Seam tractor | Aligns and tightens edges before bonding | Adjustable jaw width |
| Seam weights | Holds seam flat during cooling | 7.5 kg minimum |
| Carpet cutter | Cuts straight, clean edges | Hooked blade or straight edge cutter |
Grooved-base seaming irons protect delicate pile fibres from singeing while melting the adhesive evenly underneath. This matters most with loop-pile and Berber carpets, where direct heat contact burns the surface quickly.
Pro Tip: Set your seaming iron to 140–160°C before you begin. Too low and the adhesive will not melt fully. Too high and you risk scorching the backing or melting synthetic fibres.
For finishing the edges of your carpet join, solid brass trims from Qualitycarpettrims provide a durable, professional boundary that will not split, bend, or dent the way cheaper wooden, plastic, or aluminium trims do. Qualitycarpettrims offers ten hand-finished powder-coated finishes, so the trim matches your interior rather than fighting it.
How do you prepare carpet edges and layout for seaming?
Preparation is where most DIY carpet joins succeed or fail before the iron even heats up. Accurate measuring, clean cutting, and correct fibre alignment all happen in this stage.
Start by planning your seam location carefully. Seam placement should avoid high-traffic zones and doorways. A seam in a doorway takes constant foot traffic from multiple angles, which breaks down the adhesive bond far faster than a seam placed in the middle of a room.
Once you have chosen your seam location, follow these preparation steps:
- Lay both carpet pieces in position and allow them to relax for at least 30 minutes. Cold or freshly rolled carpet holds tension that distorts your cut line.
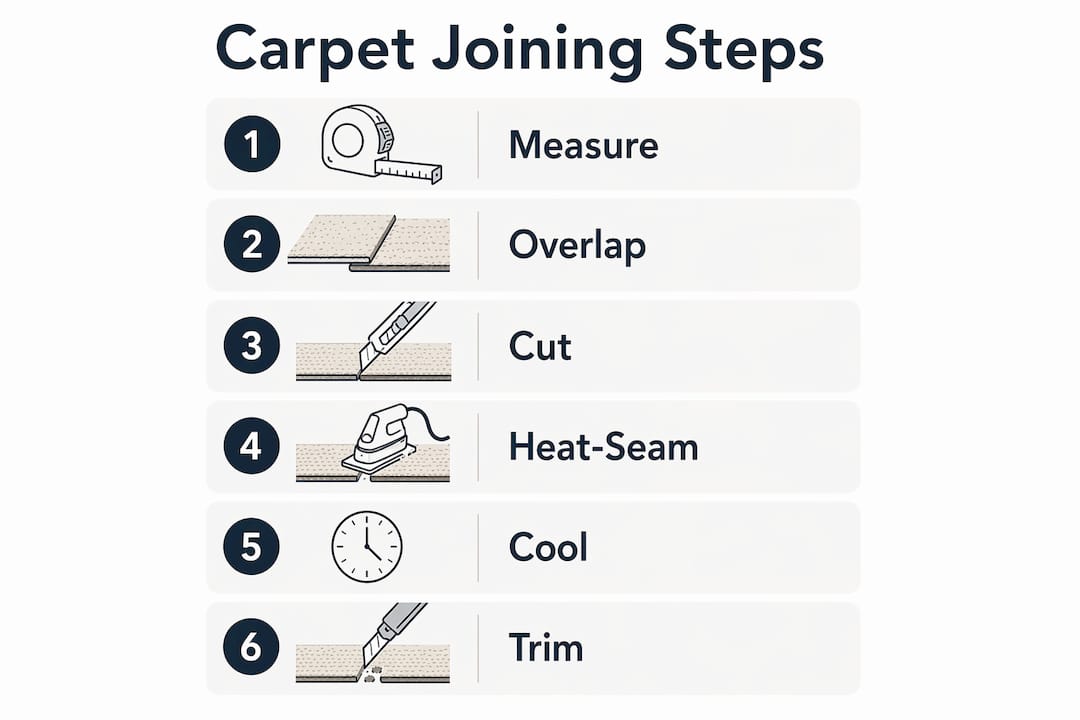
- Overlap the two carpet pieces by 2.5–5 cm along the seam line. This overlap is the foundation of the double-cut method.
- Using a straight edge and a sharp carpet cutter, cut through both layers simultaneously along the overlap. This single cut produces two perfectly matching edges that butt together without a gap.
- Separate the cut pieces and remove the offcuts. Check both edges for fraying or loose fibres.
- Use a Phillips screwdriver to gently tease apart any fibres that have been compressed or folded along the cut edge. This prevents fibres from being trapped under the seam and causing a visible ridge.
- Dry-fit both pieces together and check the join by eye and by feel. The edges should meet flush with no gap and no overlap.
Overlapping by 2.5–5 cm before double-cutting produces a butt joint with no gap. This technique is the single most reliable method for achieving a tight, invisible seam on any carpet type.
Pro Tip: Mark your seam line on the underlay or subfloor with a chalk line before laying the carpet. This gives you a fixed reference point and prevents the seam from drifting during fitting.
How do you heat-seam and bond a carpet join?
Heat seaming is the industry-standard method for joining carpet edges. It uses a hot-melt seam tape activated by a seaming iron to create a permanent adhesive bond between two carpet backings.
Follow these steps in order:
- Fold back both carpet edges to expose the subfloor along the seam line.
- Centre the hot-melt seam tape, adhesive side facing up, directly under where the two edges will meet.
- Set your seaming iron to 140–160°C and allow it to reach full temperature before you begin.
- Slide the iron under the first carpet edge and onto the tape. Work in 300mm sections for consistent adhesion across the full length of the seam.
- Move the iron steadily forward with a smooth, swooping motion. Keep the iron moving at all times. Pausing in one spot melts the backing and damages fibres beyond repair.
- As the iron moves forward, press both carpet edges firmly down onto the molten adhesive immediately behind it. Butt the edges tightly together with no gap.
- Run a heavy-duty seam roller over the join while the adhesive is still warm. Rolling under pressure forces the adhesive deep into the carpet backing, creating a bond that resists lifting.
- Place seam weights along the completed section. A 7.5 kg seam weight during cooling locks carpet fibres into the adhesive and prevents the seam from lifting as it sets.
- Allow the seam to cool fully before moving on. Wait at least 4 hours before allowing foot traffic or replacing furniture.
The table below compares the two most common carpet seaming techniques:
| Technique | Method | Best for | Key risk |
|---|---|---|---|
| Hot-melt heat seaming | Seaming iron melts tape adhesive | All carpet types, permanent joins | Overheating if iron pauses |
| Double-sided tape seaming | Pressure-activated adhesive tape | Temporary joins, thin carpets | Lower bond strength under heavy traffic |
Pro Tip: Use a seam tractor to pull and align both edges tightly together just before the iron reaches each section. Seam tractors align edges and prevent the small gaps that are easy to miss until the adhesive has already set.
For a broader look at how carpet meets other flooring types at transitions, the Qualitycarpettrims guide on carpet to hardfloor connections covers the finishing techniques that follow seaming.
How do you fix common carpet joining problems?
Even with careful preparation, problems appear. Knowing how to identify and correct them before the adhesive fully cures saves you from re-doing the entire seam.
Common issues and their remedies:
- Seam gap visible after cooling. The edges were not butted tightly enough before the adhesive set. Re-heat the affected section with the seaming iron, press the edges together firmly, and re-roll immediately.
- Air bubbles or raised sections along the seam. The carpet was not pressed down quickly enough after the iron passed. Slit the bubble carefully with a sharp blade, apply heat to re-activate the adhesive, and press flat with the roller.
- Adhesive bleed-through onto the pile surface. The iron temperature was too high, or the tape was positioned too close to the surface. Trim any adhesive residue carefully with scissors once fully cooled.
- Misaligned pile direction across the seam. Both carpet pieces must run in the same pile direction. If they do not, the seam will catch light differently on each side and remain visible regardless of how tight the bond is.
- Seam lifting after a few weeks. The seam was placed in a high-traffic area, or the weights were removed before the adhesive had fully cured. Re-bond using fresh seam tape and allow the full 4-hour curing period.
For final finishing, tuck the carpet edges neatly under any skirting boards and secure them with gripper rod. At doorways and floor transitions, a carpet to carpet threshold strip from Qualitycarpettrims covers the join cleanly and protects the edge from foot traffic. Solid brass construction means these strips will not buckle or crack under daily use, unlike plastic or aluminium alternatives.
To extend the life of your seam, vacuum across it rather than along it for the first few weeks. This reduces the stress on the bonded edges while the adhesive continues to cure fully.
Key takeaways
Successful carpet joining depends on correct preparation, controlled heat application, and adequate cooling time under pressure.
| Point | Details |
|---|---|
| Preparation is critical | Overlap carpet by 2.5–5 cm and double-cut both layers for a perfect butt joint. |
| Iron temperature matters | Set the seaming iron to 140–160°C and work in 300mm sections for even adhesion. |
| Keep the iron moving | Pausing the iron in one spot damages the backing and ruins the seam. |
| Roll while warm | Press the seam roller over the join immediately after bonding to force adhesive into the backing. |
| Allow full curing time | Wait at least 4 hours before foot traffic to let the adhesive bond set completely. |
What I have learned from years of watching carpet seams fail
The most common reason a DIY carpet seam fails is not the tools or the tape. It is impatience. Homeowners rush the cooling phase, replace furniture after an hour, and then wonder why the seam lifts within a fortnight.
The second most common mistake is pausing the seaming iron. Every time the iron stops moving, it concentrates heat in one spot. That heat melts the backing, weakens the adhesive bond, and creates a visible lump in the finished seam. Steady, continuous movement is the single most important physical skill in carpet seaming, and it takes practice to get right.
My honest advice: practise on a scrap piece of carpet before you touch the real thing. Cut two offcuts, tape them together, and run the iron across the join. You will immediately feel the correct speed and pressure. That muscle memory transfers directly to the actual seam.
The seam tractor is the tool most DIY guides skip entirely, and it is the one that makes the biggest difference. Pulling both edges tight with a tractor before the iron arrives prevents the micro-gaps that only become visible once the adhesive has cooled. You cannot close those gaps without re-doing the section.
For finishing, do not underestimate the trim. A solid brass carpet to carpet trim from Qualitycarpettrims protects the seam edge at transitions and gives the whole installation a finished, professional appearance. Wooden, plastic, and aluminium trims split, bend, and corrode. Solid brass does not.
— Matt
Qualitycarpettrims: the finishing touch your carpet join deserves
Once your seam is bonded and cooled, the edge trim is what separates a DIY result from a professional one.

Qualitycarpettrims supplies solid brass, powder-coated trims hand-finished in ten luxury colours to match any interior. These trims will not split, dent, or bend under daily use, unlike wooden, plastic, or aluminium trims that degrade quickly. The matwell and carpet edge trims are designed specifically for the kind of clean, durable finish that makes a carpet join disappear into the floor. Browse the full range of carpet to carpet trims at Qualitycarpettrims and order with free samples and fast UK delivery.
FAQ
What is the best method for joining carpet edges?
Hot-melt heat seaming is the most reliable method for joining carpet edges. It uses a seaming iron set to 140–160°C to activate adhesive tape, creating a permanent bond between two carpet backings.
How do I get an invisible carpet seam?
Use the double-cut method by overlapping both carpet pieces by 2.5–5 cm and cutting through both layers simultaneously. This produces two perfectly matched edges that butt together with no visible gap.
How long should I wait before walking on a new carpet seam?
Wait at least 4 hours after completing the seam before allowing foot traffic or replacing furniture. This gives the hot-melt adhesive time to cure fully and prevents the seam from lifting.
Where should I place a carpet seam in a room?
Place seams in low-traffic areas away from doorways. Seams in high-traffic zones break down faster and remain more visible, reducing both durability and appearance.
Can I join carpet without a seaming iron?
Double-sided carpet tape provides a temporary alternative for thin carpets or short-term installations. For permanent joins in any standard residential carpet, a seaming iron with hot-melt tape produces a far stronger and longer-lasting bond.
Recommended
- Step-by-step carpet threshold installation for a perfect finish
- Seamless carpet to hardfloor connections: expert guide
- Step by step flooring trim installation guide
- Step by step edge trim fitting: your complete DIY guide