
Blog
Understanding trim compatibility: a DIY homeowner’s guide

Jun
TL;DR:
- Trim compatibility involves ensuring that all trims relate through proportionality, finish, and architectural style in a cohesive home design. Measuring existing trims accurately and considering the home’s style language help homeowners select appropriate profiles that create visual harmony. Using durable materials like solid brass and applying transition blocks can prevent mismatches and promote long-lasting interior finishes.
Trim compatibility is defined as the relationship between flooring trims, architectural profiles, and interior finishes that creates a cohesive, visually unified home. Getting it right does not mean every trim must be identical. It means every trim must relate to the others through consistent proportion, finish, and architectural intent. Homeowners who grasp this principle avoid the most common renovation mistake: replacing a single trim without considering how it reads against everything else in the room. Solid brass and powder-coated trims, such as those supplied by Qualitycarpettrims, offer the durability and finish consistency that makes understanding trim compatibility far easier to put into practice.
What does understanding trim compatibility actually mean?
Trim compatibility is not about finding an exact duplicate of what you already have. Trim profiles need not be identical to be compatible. They must relate through consistent proportion and architectural intent. That distinction changes everything about how you shop for trims.
Traditional architecture favours detailed, curved profiles with layered depth. Modern interiors require simple, flat, or square-edge trims. Mixing the two without intention creates a visual clash that no amount of paint will fix. The first question to ask before buying any trim is not “does this match?” but “does this belong to the same design family?”
Flooring trims sit at transition points: doorways, room edges, and changes in floor surface. These are the most visible lines in a room. When they conflict in style or proportion, the eye catches it immediately. When they relate, even subtly, the room feels finished and deliberate.
How do you measure existing trims for a precise match?
Accurate measurement is the foundation of any trim compatibility guide. Bringing a physical sample to your supplier is the single most reliable method for profile matching. Photos are insufficient. Lighting, angle, and camera distortion all misrepresent the true profile shape.
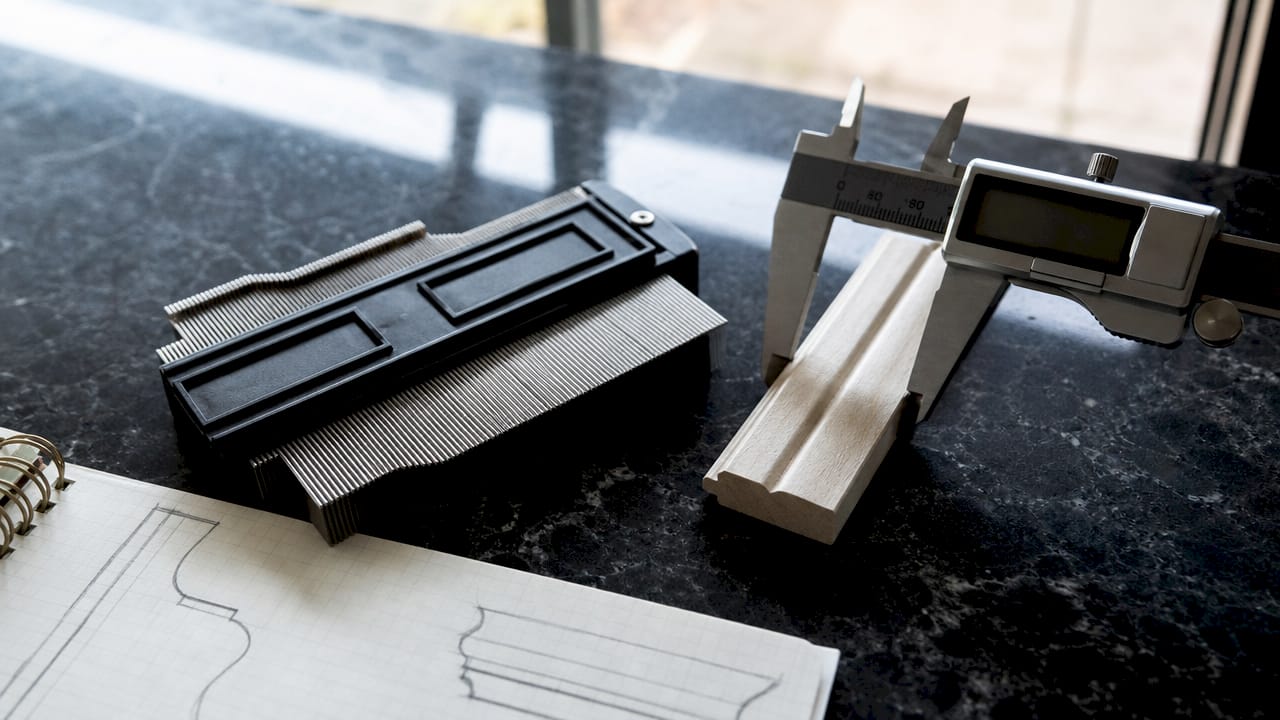
Use calipers or a profile gauge to capture the exact width, height, thickness, and any curves or steps in the existing trim. A profile gauge presses against the trim and holds its shape, giving you a physical template to compare against new stock. These tools cost very little and save a great deal of frustration.
Key measurements to take before purchasing any replacement or complementary trim:
- Overall width from wall edge to floor edge
- Height from floor surface to the top of the trim
- Thickness at the thickest point
- Profile detail including any curves, steps, or bevels
- Reveal depth where the trim meets the wall or skirting board
Minor mismatches can be corrected by caulking or light sanding. Significant mismatches require full section replacement. Getting the measurement right the first time avoids that cost entirely.
Pro Tip: Take your profile gauge reading and lay it flat on a piece of paper. Trace around it and bring that paper template to the supplier alongside the physical sample. It gives you a backup reference if the sample gets damaged in transit.
What is ‘style language’ and why does it govern trim selection?
Every home has a style language. It is the set of visual rules that its architecture follows, expressed through the angularity or softness of profiles, the complexity of mouldings, and the proportions of doors and windows. Consistent casing thickness and reveal lines across all doors and windows on a single floor prevent visual disjunction. That principle applies equally to flooring trims.
Matching your trim selection to your home’s architectural era is not a stylistic preference. It is the difference between a renovation that looks considered and one that looks accidental. A Victorian terrace calls for trims with some weight and presence. A 1970s open-plan bungalow calls for something flatter and more restrained.
How to read your home’s style language before choosing trims:
- Identify the era. Note the door panel style, skirting board height, and window architrave profile. These tell you whether your home leans traditional, transitional, or modern.
- Assess the profile complexity. Count the steps and curves in your existing skirting. Simple profiles belong with simple trims. Layered profiles belong with trims that have some depth.
- Check the reveal lines. The reveal is the small step between the trim face and the wall or floor surface. Consistent reveal depth across all trims in a room creates a quiet visual rhythm.
- Note the finish tone. Warm brass tones read differently from cool silver tones. Your existing door hardware and light fittings will tell you which direction to go.
“Sightlines are the ultimate test of trim compatibility. Jarring style changes in connected rooms cause visual discomfort, even when homeowners cannot identify the exact source.” Choose the right trim profile
In open-plan spaces, transition your trim styles gradually rather than switching abruptly at a doorway. A shared paint colour or finish tone across different profiles is the simplest way to maintain coherence across a large floor area.
How do you mix different trim profiles without a mismatched look?
Mixing different trim profiles works when thickness, proportion, and finish remain consistent. The profiles themselves can vary. The relationships between them must not. This is the principle that professional designers use when specifying trims across multi-room renovations.
The most practical strategies for mixing trim profiles successfully:
- Maintain consistent finish colour. Painting all trims the same colour and sheen is a highly effective method for creating cohesion across varied profiles. The eye reads the colour first and the profile shape second.
- Match proportional weight. A heavy, wide skirting board needs a flooring trim with some visual presence. A slim, modern skirting needs a low-profile trim. Mismatched proportional weight is more disruptive than mismatched profile shape.
- Use transition blocks. Plinth blocks and corner blocks separate incompatible profiles at junctions. They act as a visual full stop between two different trim styles, preventing a direct line-of-sight clash.
- Keep the design language consistent. All trims in a connected space should share either angularity or softness. Do not mix sharp square-edge profiles with heavily curved ones in the same sightline.
Pro Tip: Before committing to a new trim across a full room, place a short sample length next to your existing skirting board and step back six feet. That distance is how most people experience a room. If it reads well from there, it will read well installed.
Homeowners often replace trims without researching their home’s architectural era first. That single oversight accounts for most visible mismatches in DIY renovations. Spending twenty minutes identifying your home’s style language before purchasing saves hours of remedial work.
How do flooring trims complement floors and architectural features?
The relationship between a flooring trim and the floor it borders is one of the most overlooked trim compatibility factors. Trim thickness must relate to flooring height. A thick, raised trim next to a thin vinyl floor creates an awkward step. A low-profile trim next to a thick hardwood floor looks undersized and unfinished.
Coordinating trim finishes with other architectural details ties a room together. Door hardware, light switch plates, and curtain pole brackets all carry a finish tone. When your flooring trim matches or closely relates to those finishes, the room reads as intentional rather than assembled from separate decisions.
| Flooring type | Recommended trim approach | Finish consideration |
|---|---|---|
| Carpet to hard floor | Door threshold bar with flat top profile | Match to door hardware finish |
| Carpet to carpet | Low-profile joining trim | Consistent colour across both carpet tones |
| Vinyl or laminate edge | Carpet edge trim with clean square edge | Neutral or matching floor tone |
| Matwell border | Matwell trim with defined lip | Coordinate with entrance hall hardware |
Solid brass and powder-coated trims resist splitting, bending, and denting in ways that wooden or plastic trims simply cannot. Wooden trims swell with moisture and split at edges. Plastic trims dent and discolour. Brass holds its form and its finish across years of foot traffic, which means your trim compatibility choices remain intact long after installation.
A common mistake is pairing ornate, heavily profiled trims with minimal modern floors. The contrast draws the eye downward for the wrong reason. The trim becomes a distraction rather than a finishing detail. Choosing a trim that sits quietly within the floor transition, rather than competing with it, is always the stronger decision.
Key takeaways
Trim compatibility is determined by consistent proportion, finish, and architectural intent across all trims in a connected space, not by finding identical profiles.
| Point | Details |
|---|---|
| Measure before you buy | Use calipers or a profile gauge and bring a physical sample to your supplier for accurate matching. |
| Read your home’s style language | Identify your home’s architectural era before selecting any trim to avoid profile clashes. |
| Consistent finish unifies varied profiles | Matching paint colour and sheen across different trim shapes creates cohesion without identical profiles. |
| Use transition blocks at junctions | Plinth or corner blocks separate incompatible profiles and prevent direct line-of-sight mismatches. |
| Choose materials that last | Solid brass and powder-coated trims hold their form and finish far longer than wooden or plastic alternatives. |
Why I think most homeowners approach trim compatibility backwards
Most homeowners start with the trim they want and then try to make it fit their home. The right approach is the reverse. Start with your home’s architecture, read its style language, take your measurements, and then find the trim that belongs there.
I have seen beautifully chosen trims look completely wrong because the homeowner selected them in isolation, without standing in the room and looking at what was already there. The trim was not the problem. The process was.
The other thing I have learnt is that material quality matters more than most people expect. A well-proportioned trim in solid brass, hand-finished in a colour that relates to the door hardware, will look better in ten years than it does on installation day. A cheap wooden or plastic trim will look worse. That trajectory matters when you are making a decision that is meant to last.
For heritage homes especially, I always recommend selecting trims that respect the home’s original character. A Victorian hallway with a powder-coated brass threshold bar in an antique gold finish looks as though it was always there. That is the goal. Not a trim that shouts, but one that belongs.
— Matt
Qualitycarpettrims: solid brass trims built for lasting compatibility
Choosing the right trim is only half the work. Choosing one that holds its finish and form for years is the other half.

Qualitycarpettrims supplies solid brass flooring trims, hand-finished in 10 luxury colours, designed to complement every flooring type from carpet to hard floor. Each trim resists the splitting, bending, and denting that wooden and plastic trims are prone to. Whether you need a matwell trim for an entrance hall or a door threshold bar for a busy doorway, the full range is available to order online with fast UK delivery. Free samples are available so you can check the finish against your existing hardware before committing.
FAQ
What is trim compatibility in flooring?
Trim compatibility is the principle that flooring trims should relate to each other and to the home’s architecture through consistent proportion, finish, and style. Identical profiles are not required, but intentional relationships between trims are.
How do I know which trim profile matches my existing one?
Use a profile gauge or calipers to measure the width, height, thickness, and profile detail of your existing trim, then bring a physical sample to your supplier. Photos are not reliable for profile matching.
Can I mix different trim profiles in the same room?
Yes. Mixing trim profiles works when finish colour, sheen, and proportional weight remain consistent across all profiles in the same sightline.
What are trim compatibility factors I should check before buying?
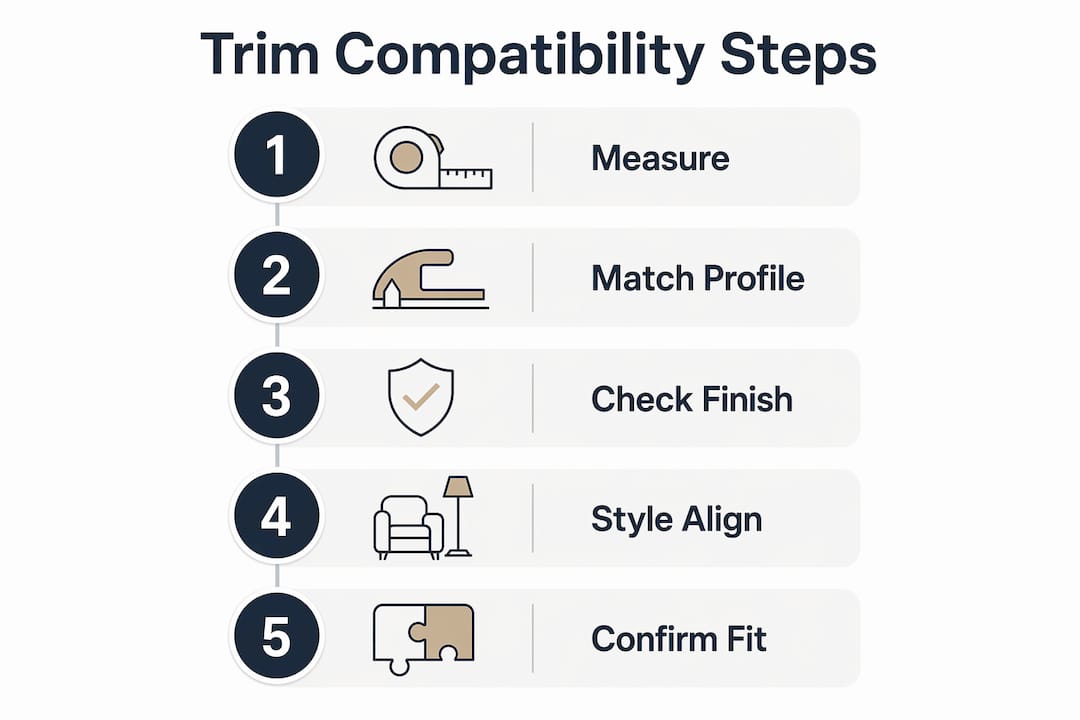
The key factors are profile proportion, finish colour and sheen, architectural style alignment, and the relationship between trim thickness and flooring height. Checking all four before purchasing prevents the most common mismatches.
Why are solid brass trims better for long-term compatibility?
Solid brass and powder-coated trims hold their form and finish under heavy foot traffic. Wooden trims split and swell; plastic trims dent and discolour. A brass trim that looks right on installation day will still look right years later, which protects your original compatibility choices.
Recommended
- Residential trim use: a homeowner’s complete guide
- What are multi-purpose trims? A homeowner’s guide
- Why trims matter: choosing the right finish for your renovation
- Choosing trims for renovations: the complete guide