
Blog
Installing carpet to vinyl transitions with metal trims

Mar
Struggling with unsafe or unsightly gaps between your carpet and vinyl flooring? Many UK homeowners face challenges achieving smooth, durable transitions that prevent trip hazards and complement interior decor. British-made metal door bars offer a reliable solution, combining strength, elegance, and longevity when installed correctly. This guide walks you through selecting the right trim profile and installing it step by step for a professional finish that lasts decades.
Table of Contents
- Prerequisites And What You Need
- Step 1: Measuring And Cutting The Transition Trim
- Step 2: Preparing The Surface
- Step 3: Fixing The Metal Door Bar
- Step 4: Finishing Touches And Inspection
- Common Mistakes And How To Troubleshoot Them
- Expected Outcomes And Maintenance
- Discover Premium British-Made Metal Trims For Your Project
- FAQ
Key takeaways
| Point | Details |
|---|---|
| Accurate measurement | Measure twice and cut once to prevent gaps or overlaps that compromise safety and appearance. |
| Surface preparation | Clean, dry, and level surfaces ensure strong adhesive bonds and stable trim fitting. |
| Secure fixing | Combine construction adhesive with screw fixing to eliminate movement and reduce trip hazards. |
| Full curing time | Allow adhesive to cure completely per manufacturer instructions before resuming foot traffic. |
| British-made quality | Solid metal trims hand finished in the UK deliver superior durability and aesthetic appeal compared to inferior alternatives. |
Prerequisites and what you need
Before starting your carpet to vinyl transition installation, assembling the correct tools and materials saves time and frustration. You need a metal saw or cutter designed for solid metal profiles, construction-grade adhesive suitable for flooring applications, screws compatible with your substrate, a screwdriver or drill, measuring tape, and marking tools like pencils or fine markers. Invest in quality British-made metal trims that match your doorway dimensions and interior style, choosing from profiles specifically engineered for carpet to hardfloor trims applications.
Surface conditions matter enormously for lasting results. Proper surface preparation including cleaning and levelling ensures the transition trim fits securely and prevents future lifting or gaps. Both carpet and vinyl edges must be completely dry, free from dust, debris, old adhesive residue, and structural irregularities that prevent flush contact. Check for height differences between flooring types and address them with levelling compounds if necessary.
Selecting carpet trims requires matching profile depth to your flooring thickness. Measure the height difference between carpet and vinyl floor edge trim surfaces to identify the appropriate ramp angle. British-made metal door bars come in various finishes including brass, chrome, satin nickel, and bronze, allowing you to coordinate with door furniture and interior hardware seamlessly.
Essential tools checklist:
- Metal saw or cutter for precise trim cutting
- Construction adhesive formulated for flooring
- Appropriate screws and fixings for substrate type
- Screwdriver or electric drill
- Measuring tape (minimum 3 metres)
- Pencil or permanent marker
- Spirit level for checking surface flatness
- Cleaning materials (vacuum, cloths, degreaser)
Pro Tip: Investing 30 minutes in thorough surface preparation prevents costly rework later. Use a spirit level across the entire doorway width and apply levelling compound to any dips exceeding 2mm. Clean with a degreasing agent to remove oils or residues that weaken adhesive bonds.
Step 1: measuring and cutting the transition trim
Accurate measurement forms the foundation of successful trim installation. Place your measuring tape across the doorway from frame to frame at the exact position where the trim will sit, typically centred over the gap between carpet and vinyl. Record this measurement in millimetres for precision, then add 2mm tolerance if your doorframe has slight irregularities. Transfer this measurement to your metal door bar using a fine pencil mark on both edges.
Cutting solid metal requires the right tools and technique. Position the marked trim securely in a vice or workbench clamp to prevent movement during cutting. Use a metal saw with fine teeth or a quality metal cutter, maintaining steady, even pressure throughout the cut. Avoid forcing the blade, which can damage the hand-finished surface or create rough edges that require additional filing.
Double-checking measurements before cutting saves material and money. Common mistakes such as cutting trims inaccurately often cause alignment issues and trim failure. Lay the cut trim across the doorway without fixing to verify fit, checking for clearance on both sides and ensuring the profile aligns correctly with carpet and vinyl edges.
Measuring and cutting steps:
- Measure doorway width at three points (top, middle, bottom) and use the smallest measurement
- Mark cutting points clearly on both edges of the trim
- Secure trim firmly before cutting to prevent slipping
- Cut smoothly with appropriate metal-cutting tools
- Test fit before proceeding to surface preparation
Pro Tip: When working with carpet transition strips in particularly tight doorways, subtract 1mm from your measurement to allow easier installation whilst maintaining a snug fit.
Step 2: preparing the surface
Surface preparation determines whether your transition trim stays secure for decades or loosens within months. Start by vacuuming the entire doorway area thoroughly, paying special attention to carpet edges where dust accumulates. Remove any remnants of previous trim installations, including old adhesive, tacks, or gripper strips that protrude above floor level.
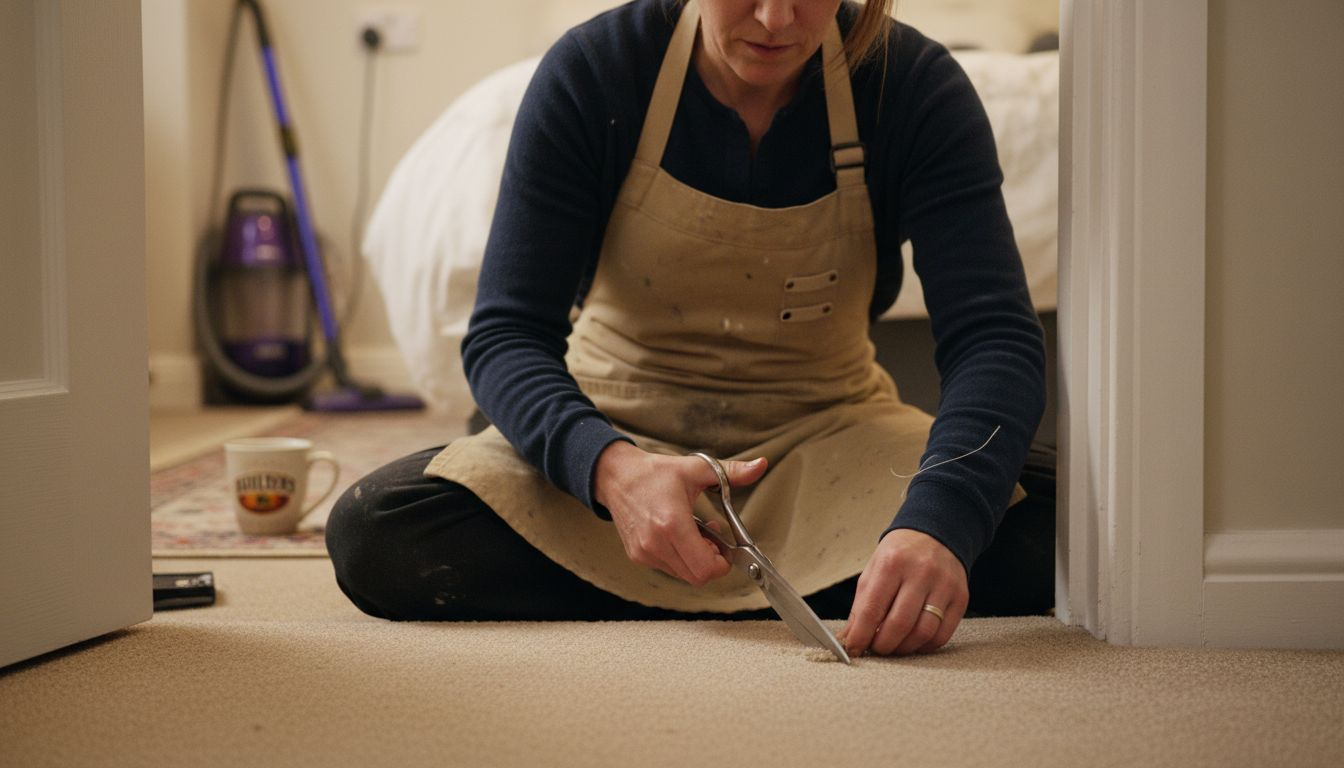
Carpet edges often fray or lift slightly at doorways. Trim loose fibres cleanly with sharp scissors and ensure the carpet sits flat against the substrate. For vinyl flooring, check that edges are firmly adhered with no bubbling or lifting. Apply vinyl adhesive to any loose sections and weight them down until bonded. Proper surface preparation including cleaning and levelling prevents trim lifting and gaps.
Levelling creates the flush finish that distinguishes professional installations from amateur attempts. Place a spirit level across the transition area in multiple directions. Height differences exceeding 3mm require levelling compound application. Mix compound according to manufacturer instructions, apply to low spots, and feather edges smoothly. Allow complete drying before proceeding, typically 2 to 4 hours depending on product and conditions.
Moisture compromises adhesive bonds fatally. Test both carpet and vinyl areas with a moisture meter if available, or simply press a clear plastic sheet over each surface for 24 hours. Condensation underneath indicates excessive moisture requiring additional drying time. In bathrooms or kitchens, consider applying a moisture barrier primer designed for carpet to tile trim applications before fixing your metal door bar.
Final cleaning removes fine dust particles that interfere with adhesive contact. Wipe the entire installation area with a cloth dampened with white spirit or methylated spirits, which evaporates quickly without leaving residue. For vinyl floor edge trim areas, this solvent cleaning also removes manufacturing oils that prevent proper bonding.
Step 3: fixing the metal door bar
Applying adhesive correctly ensures your transition trim withstands years of foot traffic without movement. Select construction-grade adhesive specifically formulated for metal to substrate bonding, avoiding general-purpose products that lack necessary strength. Apply adhesive in continuous beads along the centre line where the metal door bar will sit, spacing beads approximately 50mm apart for optimal coverage without excess squeeze-out.
Pre-drilling prevents metal damage and ensures accurate screw placement. Most quality British-made metal door bars feature pre-drilled holes, but if yours requires drilling, use a metal bit slightly smaller than your screw diameter. Mark drilling positions at 300mm intervals along the trim length, positioning holes to penetrate solid substrate rather than gaps between floorboards. Drill slowly to avoid heat buildup that damages the hand-finished surface.
Positioning the trim requires steady hands and attention to alignment. Press the metal door bar firmly into the adhesive bed, ensuring the profile edge aligns precisely with both carpet and vinyl edges. The trim should sit flush with no gaps underneath that create hollow spots or clicking sounds when stepped on. Insert screws hand-tight initially, checking alignment remains true before final tightening.
Securing with screws provides mechanical strength that adhesive alone cannot match. Tighten screws progressively from the centre outward, which prevents the trim bowing or lifting at edges. Apply consistent pressure without over-tightening, which can strip threads in softer substrates or distort the metal profile. Neglecting adhesive curing time causes trim loosening and failure, so resist testing the installation immediately.
Fixing procedure:
- Apply construction adhesive in parallel beads along installation line
- Pre-drill screw holes if not already present in the trim
- Position trim carefully, aligning with both flooring edges
- Insert all screws hand-tight before final tightening
- Tighten screws progressively from centre outward
- Wipe excess adhesive immediately with damp cloth
- Allow full curing time per adhesive manufacturer instructions
Maintain even pressure across the entire trim length during the critical first 30 minutes after installation. Place weights at 500mm intervals if working alone, using soft cloths to protect the finish. Check alignment every 10 minutes, making minor adjustments before adhesive begins setting. Protect the installation area from foot traffic during curing, typically 24 to 48 hours for full strength development.
Step 4: finishing touches and inspection
Cleaning excess adhesive promptly preserves your trim’s appearance and prevents permanent staining. Use a damp cloth to wipe squeeze-out immediately after pressing the trim into position, when adhesive remains pliable. For dried adhesive, carefully scrape with a plastic blade held at a shallow angle, avoiding metal contact that scratches the finish. White spirit removes stubborn residue without damaging hand-finished surfaces.
Thorough inspection identifies issues whilst correction remains simple. Examine the entire trim length in good lighting, looking for gaps between trim and flooring surfaces, misalignment, or areas where the profile doesn’t sit flush. Run your hand along both edges, feeling for sharp protrusions, loose sections, or height differences that create trip hazards. Check screw heads sit below or flush with the trim surface.
Gap filling addresses minor imperfections that detract from a professional finish. Small gaps under 2mm between trim edges and flooring can be filled with colour-matched flexible sealant, smoothed with a wet finger before it skins over. Larger gaps indicate measurement or cutting errors requiring trim removal and reinstallation. Never use excessive sealant to compensate for poor fitting, which creates an amateur appearance and fails over time.
Final inspection checklist:
- Trim sits flush with no rocking or hollow spots
- No gaps exceed 1mm between trim and flooring edges
- All screw heads are flush or countersunk
- No sharp edges or protrusions present trip hazards
- Adhesive residue completely removed
- Trim finish undamaged during installation
Curing time cannot be rushed without compromising durability. Follow adhesive manufacturer recommendations strictly, typically 24 hours minimum before light foot traffic and 48 hours before resuming normal use. Place warning signs or temporary barriers across doorways during this period. After full curing, test trim stability by pressing firmly at multiple points along its length. Properly installed metal door bar threshold systems should show zero movement under firm pressure.
Common mistakes and how to troubleshoot them
Inaccurate measuring causes the most frequent installation failures, resulting in trims that don’t fit properly or leave dangerous gaps. Measure your doorway width at three different points and use the smallest dimension to ensure clearance. Cut conservatively, remembering you can always trim slightly more but cannot add material back. If you’ve cut too short, fill minor gaps under 3mm with matching sealant, but gaps exceeding this require purchasing a new trim.
Ignoring adhesive curing recommendations leads to premature failure and loose trims. 50% of reported installation failures linked to measurement or curing errors highlight the importance of patience. Never walk on freshly installed trims or allow pets access during the critical first 24 hours. If loosening occurs, carefully remove the trim, clean all old adhesive thoroughly, and reinstall with fresh adhesive and proper curing time.
Using incorrect cutting tools damages solid metal door bars and creates rough edges requiring extensive filing. Standard wood saws leave ragged cuts and can chip hand-finished surfaces. Invest in a quality metal saw or angle grinder with metal cutting disc for clean, professional results. If damage occurs, fine sandpaper wrapped around a dowel can smooth minor imperfections, followed by matching touch-up finish if needed.

Insufficient surface preparation causes uneven fitting and unstable installations. Debris under the trim creates hollow spots that crack under weight, whilst moisture prevents adhesive bonding. If your trim rocks or clicks when stepped on despite proper fixing, remove it, recheck substrate flatness, apply levelling compound where needed, and reinstall after complete drying. For carpet to tile transition applications, height differences often exceed standard trim capabilities, requiring specialist profiles.
| Mistake | Consequence | Solution |
|---|---|---|
| Cutting trim too short | Unsightly gaps, reduced stability | Use smallest doorway measurement, cut conservatively |
| Walking on uncured adhesive | Trim displacement, weak bond | Wait full 24-48 hours before traffic |
| Skipping surface levelling | Rocking trim, trip hazards | Apply levelling compound, allow proper drying |
| Over-tightening screws | Stripped threads, metal distortion | Tighten progressively, stop when snug |
| Using wood-cutting tools | Damaged finish, rough edges | Invest in proper metal-cutting tools |
Pro Tip: Create a pre-installation checklist covering measurements, surface condition, tool readiness, and adhesive curing time. Ticking off each item before starting prevents the majority of costly mistakes and ensures professional results on your first attempt.
Expected outcomes and maintenance
Properly installed British-made metal trims deliver exceptional longevity under normal residential use. Solid metal door bars can last over 20 years without requiring replacement, far exceeding the lifespan of inferior aluminium, wooden, or PVC alternatives. The hand-finished surfaces maintain their appearance when cleaned regularly, whilst the robust metal construction withstands constant foot traffic without cracking, chipping, or deforming.
Regular maintenance preserves both function and appearance. Vacuum transition areas weekly to remove grit that can scratch finishes. Clean with mild detergent diluted in warm water monthly, using a soft cloth to wipe the trim surface and edges. Avoid abrasive cleaners or scouring pads that damage hand-finished surfaces. For brass or copper finishes that develop patina over time, metal polish restores original lustre if desired.
Maintenance schedule:
- Weekly: Vacuum to remove dirt and grit
- Monthly: Clean with mild detergent solution
- Quarterly: Inspect screws for tightness
- Annually: Check adhesive bond integrity
- As needed: Polish metal finishes
Safety benefits extend beyond aesthetics. Properly fitted trims eliminate trip hazards that plague poorly executed transitions, particularly important for households with elderly residents or young children. The smooth profile guides foot traffic naturally across the height change between carpet and vinyl, reducing stumble risks. This safety enhancement can positively impact home insurance assessments and property valuations.
Long-term value justifies the investment in quality British-made products. Whilst cheaper alternatives may cost less initially, frequent replacements and potential injury costs make them false economy. Quality carpet trims manufactured in the UK to exacting standards provide guaranteed performance and aesthetic appeal that enhances your home’s value. Estate agents consistently report that quality finishing details including professional transition trims influence buyer perceptions and sale prices positively.
Periodic inspections catch minor issues before they become serious problems. Check trim stability every six months by pressing firmly along its length, listening for creaking or feeling movement. Tighten any loose screws immediately. Inspect adhesive bond quality by looking for gaps opening between trim and substrate. Address problems promptly to avoid costly replacements and maintain the seamless, durable finish your installation efforts deserve.
Discover premium British-made metal trims for your project
Ready to transform your carpet to vinyl transitions with trims engineered for lasting performance? Quality Carpet Trims offers an extensive range of British-made metal door bars crafted from solid metal and hand-finished in ten beautiful finishes. Each profile is designed specifically for seamless flooring transitions, combining safety, durability, and elegance that inferior products cannot match.

Choose from multiple finish options including polished brass, satin chrome, antique bronze, and brushed nickel to complement your interior hardware and décor perfectly. Every trim undergoes rigorous quality control and comes with comprehensive fitting guidance. Browse matwell flooring trims and carpet to hardfloor trims designed for precise applications, backed by UK manufacturing excellence and fast delivery nationwide. Discover flooring trim solutions that protect your investment whilst elevating your home’s professional finish.
FAQ
How long does adhesive curing typically take for metal door bars?
Construction-grade adhesive requires 24 to 48 hours for full curing, depending on temperature, humidity, and specific product formulation. Light foot traffic may be permissible after 24 hours, but heavy use or furniture moving should wait the full 48 hours to prevent displacement or bond failure.
Can I install a carpet to vinyl transition myself without professional help?
Yes, DIY installation is entirely feasible with the right tools, proper surface preparation, and careful attention to the step-by-step guidance provided. Most homeowners complete installations in 2 to 3 hours, achieving professional results that last decades when using quality British-made metal trims.
What maintenance do British-made metal trims require?
Minimal maintenance keeps trims looking pristine. Weekly vacuuming removes abrasive dirt, whilst monthly cleaning with mild detergent preserves finish quality. Quarterly screw checks and annual bond inspections ensure continued stability, with metal polish available for finishes that benefit from occasional restoration.
Are British-made metal door bars suitable for high-traffic areas?
Absolutely, solid metal construction specifically suits busy households and commercial applications. British-made trims withstand constant foot traffic, wheeled luggage, and cleaning equipment without cracking or deforming, offering superior durability compared to aluminium, wooden, or PVC alternatives that fail prematurely.
How do I handle height differences between carpet and vinyl floors?
Select transition trim profiles designed for your specific height differential. Profiles range from low-level strips for minimal differences to ramped designs accommodating up to 15mm variations. For larger differences, use levelling compound on the lower surface or choose specialist profiles engineered for extreme transitions.
Recommended
- Carpet To Tile Trim – Quality Carpet Trims
- Carpet To Tile Transition Strip – Overcome height differences
- Complete Guide to Selecting Carpet Trims for Perfect Finishes
- Carpet to Tile Transition: Achieving Seamless Floors