
Blog
Industry standards for flooring trims: a complete UK guide

Mar
Flooring trims are one of those finishing details that most people barely notice until something goes wrong. A raised edge catches a foot, a gap opens up between two floor surfaces, or a doorway transition looks cheap and unfinished. The truth is that trims are not decorative afterthoughts. They are structural and safety components that must meet specific UK industry standards to perform correctly. Whether you are a homeowner renovating a kitchen or a contractor fitting out a commercial space, understanding the rules, types, and best practices behind flooring trims will save you time, money, and potential liability.
Table of Contents
- What are flooring trims and why do standards matter?
- Types of flooring trims and their applications
- UK industry standards and safety regulations
- Best practices for selecting and installing flooring trims
- How to achieve a professional finish with flooring trims
- Find trims that meet industry standards and elevate your finish
- Frequently asked questions
Key Takeaways
| Point | Details |
|---|---|
| Trims are vital | Flooring trims are essential for aesthetics, safety, and finishing quality in all interior projects. |
| Follow UK standards | Use trims that meet HSE and BS safety regulations to reduce risks and ensure compliance. |
| Correct installation counts | Proper fitting and gap allowance prevent failures and maintain a professional appearance. |
| Match to design | Choose trims that either match or stylishly contrast your flooring and décor for the best result. |
What are flooring trims and why do standards matter?
A flooring trim is a profiled strip, usually made from solid metal, that bridges, edges, or finishes a flooring installation. Understanding what is flooring trim is the first step to making the right choice for your project. The main categories include edge trims, thresholds, reducers, beading, and stair nosings. Each one serves a distinct purpose depending on where floors meet, change height, or reach a boundary.
The core functions of a flooring trim are straightforward but critical:
- Covering expansion gaps left intentionally in floating floors to allow movement
- Protecting exposed edges from chipping, lifting, or fraying over time
- Creating safe transitions between surfaces of different heights or materials
- Providing a neat, finished appearance that completes the overall interior look
As noted in visual examples of flooring transitions, flooring trims cover expansion gaps, protect edges, ensure safe transitions, and provide an aesthetic finish. Without them, even the most expensive flooring installation looks incomplete and can become a genuine hazard.
Industry standards exist because a poorly fitted or incorrect trim can cause trips, void flooring warranties, and fail building inspections. Standards set minimum requirements for slip resistance, height tolerances, and material durability so that every installation performs safely over its lifetime.
A trim that looks right but fits wrong is worse than no trim at all. It creates a false sense of security while hiding a real hazard beneath.
With a clear understanding of why trims matter, let us explore the standard types available and where they are used.
Types of flooring trims and their applications
Choosing the correct trim type is not guesswork. Each profile is engineered for a specific transition scenario. Our trims terminology guide breaks down the full vocabulary, but here is a practical overview of the main types.
According to more on trim types, the key trim types include end or edge trim, threshold or door bar, reducer or ramp, scotia or beading, and stair nosing. Each has a distinct profile and purpose.
| Trim type | Typical width | Typical height | Best application |
|---|---|---|---|
| Edge trim | 20 to 30mm | 8 to 12mm | Exposed flooring edges, room perimeters |
| Threshold / door bar | 30 to 50mm | 6 to 15mm | Doorways between two floor types |
| Reducer / ramp | 40 to 60mm | 10 to 20mm | Height differences between two floors |
| Scotia / beading | 15 to 25mm | 15 to 25mm | Skirting board gaps, wall to floor joins |
| Stair nosing | 40 to 55mm | 18 to 25mm | Stair edges for safety and wear protection |
Matching the trim to the application matters enormously. A threshold door bar works perfectly in a doorway where carpet meets tile. A reducer is the right call when one floor sits noticeably higher than the other. Using the wrong profile creates an uneven surface that looks poor and can fail safety checks. For a full breakdown of which products meet UK standards for trims, it is worth reviewing the relevant guidance before purchasing.
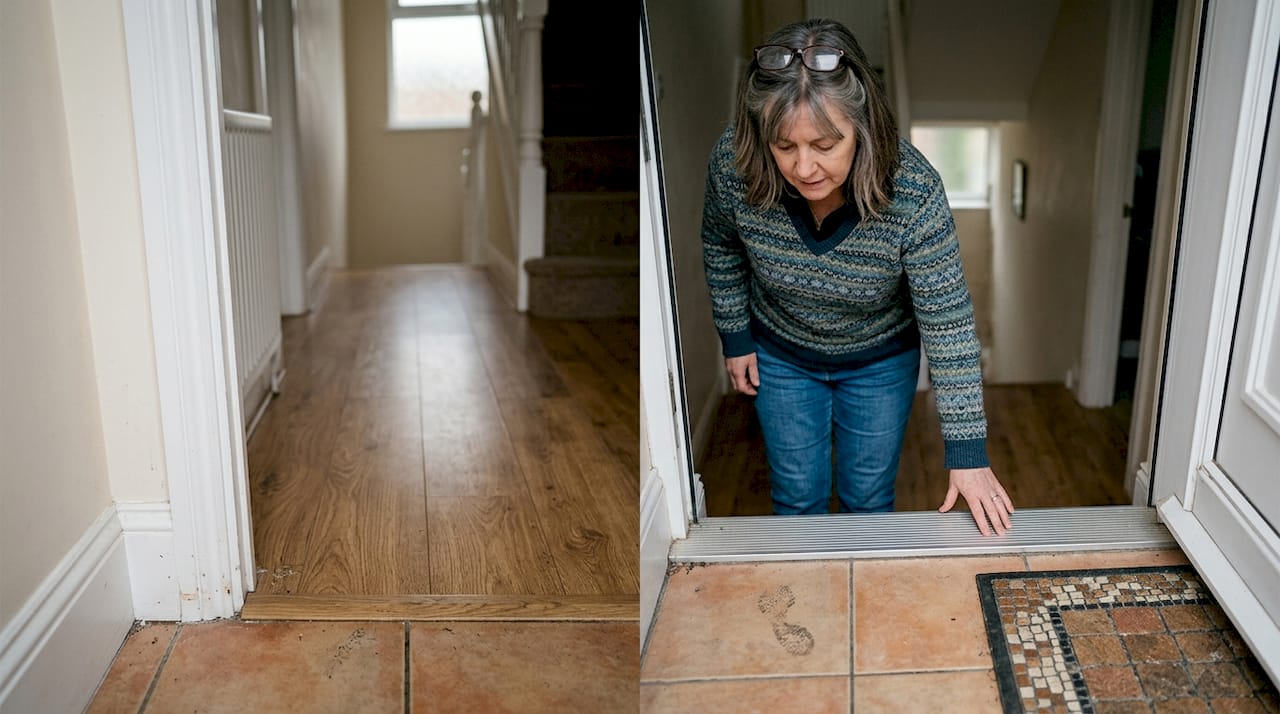
Now that you know the core types and where they are used, it is critical to understand the official standards behind trim choice and fitting.
UK industry standards and safety regulations
This is where many DIY projects and even some professional installations fall short. The UK has clear guidance and standards that apply directly to flooring trims, and ignoring them carries real consequences.
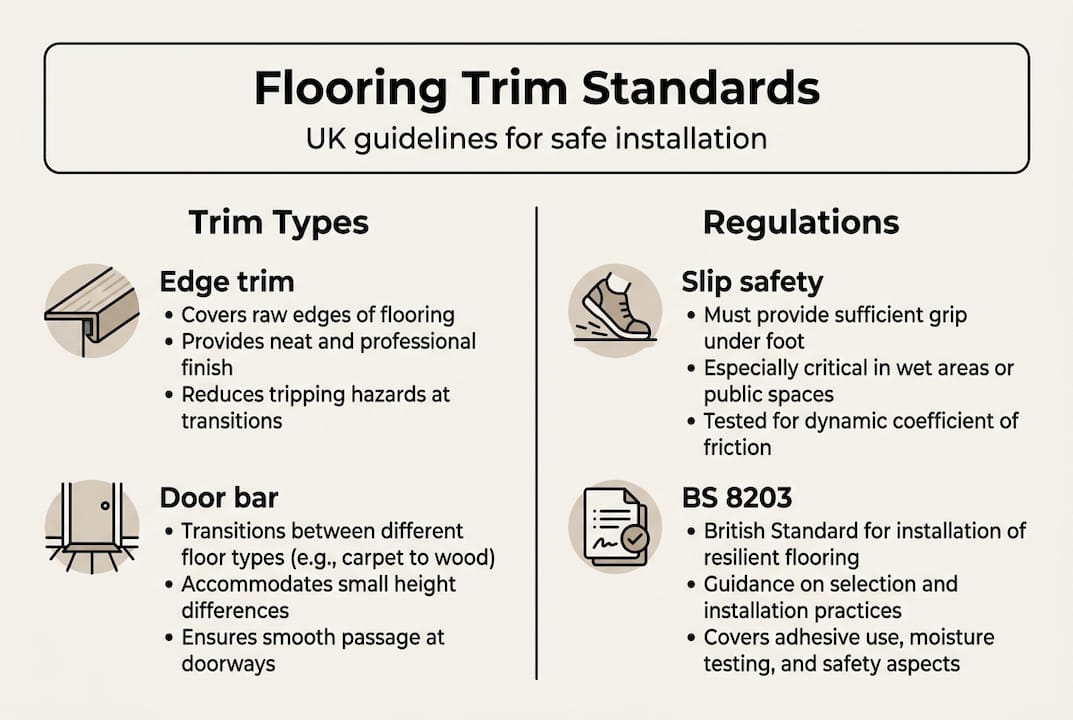
The Health and Safety Executive sets the baseline. HSE guidance requires slip-resistant floors, specifies that trims must prevent trips, and references BS 7976-2 for measuring slip resistance. For interior flooring installations, BS 8203 covers resilient floor coverings and BS 8204 covers screeds and bases. Together, these standards define what a compliant installation looks like.
Key requirements that affect trim selection and fitting include:
- Slip resistance: Trims must not create a slippery surface, particularly at stair nosings and wet area transitions
- Trip prevention: Height differences at transitions must be minimised, with ramp profiles used where floors differ by more than 4mm
- Colour contrast: In commercial settings, stair nosings and transitions must contrast visually with the surrounding floor to aid visibility
- Fixing security: Trims must be fixed firmly to the subfloor to prevent movement, lifting, or rocking underfoot
The impact of getting this right is significant. Proper installation of reducing trip hazards through correctly fitted trims can reduce trip-related incidents by up to 30%. That is not a minor improvement. In a commercial environment, it can be the difference between a safe premises and a costly liability claim.
For a detailed look at how these rules apply to specific products and finishes, the UK trim regulations page covers current 2026 requirements in plain language.
Armed with an understanding of requirements, let us look at practical best practices for fitting, finishing, and choosing the right trim.
Best practices for selecting and installing flooring trims
Selecting the right trim is half the job. Fitting it correctly is the other half. Follow these steps to get a result that looks professional and lasts.
- Identify the transition type before purchasing. Are you joining two floors of the same height, different heights, or finishing an exposed edge? The answer determines the profile you need.
- Match the finish to your decor. Solid metal trims are available in a range of hand-finished colours and textures. Choose one that either blends with your flooring or creates a deliberate contrast for visual interest.
- Measure the gap accurately. As noted by London Floor Sanding Experts, expansion gaps should be between 5 and 15mm, with 8 to 12mm being the standard for most floating floors. Never compress the gap to fit a trim.
- Prepare the subfloor. The surface beneath the trim must be clean, level, and dry. Any unevenness will cause the trim to rock or lift over time.
- Fix correctly for the floor type. Use adhesive for solid subfloors, screws for timber, and pins for softer substrates. Always centre the trim under the door so it sits evenly on both sides.
- Seal wet area trims. In bathrooms, kitchens, or utility rooms, apply a bead of silicone sealant along the trim edges to prevent moisture ingress beneath the flooring.
For detailed guidance on fitting edge trims and pro installation methods, step-by-step resources are available to walk you through each scenario.
Pro Tip: Staircases, patterned floors, and complex multi-room layouts are worth handing to a professional fitter. The cost of getting it wrong, both financially and in terms of safety, far outweighs the saving from a DIY attempt in these areas. A full visual guide can help you assess whether your project falls into the DIY or professional category.
Finally, let us summarise the essential factors that help you achieve a professional, long-lasting finish.
How to achieve a professional finish with flooring trims
The difference between a good installation and a great one often comes down to the finishing details. Here is what separates amateur results from professional ones.
Colour and finish selection is more important than most people realise. As highlighted by door bar finishing advice, matching or contrasting the trim colour and finish to your flooring and decor creates a cohesive look. A brushed gold trim on a warm oak floor looks intentional. A mismatched chrome strip on the same floor looks like an oversight. The Wood and Beyond blog also recommends professional installation for stairs, patterned floors, and complex layouts, while straight runs are well within DIY capability.
For ongoing performance, keep these maintenance points in mind:
- Inspect trims annually for lifting, loosening, or corrosion, particularly in high-traffic areas
- Re-seal wet area trims every two to three years to maintain moisture protection
- Check fixing points after any significant floor movement, especially in properties with underfloor heating
- Clean with appropriate products for the trim finish to avoid dulling or scratching the surface
For transitions between different floor types, such as finishing between floors where carpet meets tile, the trim must sit flush and secure on both sides. Any rocking or movement is a sign that the fixing has failed and needs attention immediately.
Pro Tip: Never use a trim to hide a poorly prepared subfloor. Trims are finishing components, not repair tools. If the floor beneath is uneven or damaged, fix it first. A trim fitted over a bad base will fail within months.
For those seeking trims that meet every standard and design need, discover your options below.
Find trims that meet industry standards and elevate your finish
At Quality Carpet Trims, every product is manufactured in the UK and hand-finished in 10 beautiful finishes designed to complement any interior scheme. Our solid metal door bars and trims are built to meet HSE and BS standards, giving you confidence that your installation is both safe and compliant.

Whether you are a homeowner looking for the right trim type for a single doorway or a contractor specifying products across an entire commercial fit-out, we have the range to match. Explore our matwell trims range for entrance solutions, or browse our carpet to carpet trims for seamless joins between carpeted rooms. Free samples, fast delivery, and expert advice are available to help you get every transition exactly right.
Frequently asked questions
What are the main industry standards for flooring trims in UK buildings?
The principal standards are HSE rules for slip resistance alongside BS 7976-2 and BS 8203/8204, which cover interior flooring safety and quality requirements.
How wide should the expansion gap be for fitting flooring trims?
A standard expansion gap under trims is typically 8 to 12mm, though 5 to 15mm is acceptable to allow for natural floor movement across different materials and conditions.
Are flooring trims necessary in all renovation projects?
Yes. Trims cover expansion gaps, protect edges, and ensure safe transitions, making them a necessary component in virtually all home and commercial renovation projects.
What is the safest trim for joining floors of different heights?
A reducer or ramp trim is the safest option for uneven floors, as it creates a gradual slope between surfaces that minimises trip risk and meets HSE guidance.
Recommended
- Commercial flooring trims: UK standards and installation
- Flooring trim terminology explained for UK finishes 2026
- Industry Terminology: Flooring Trims Explained
- What is a flooring transition: guide for UK homeowners 2026